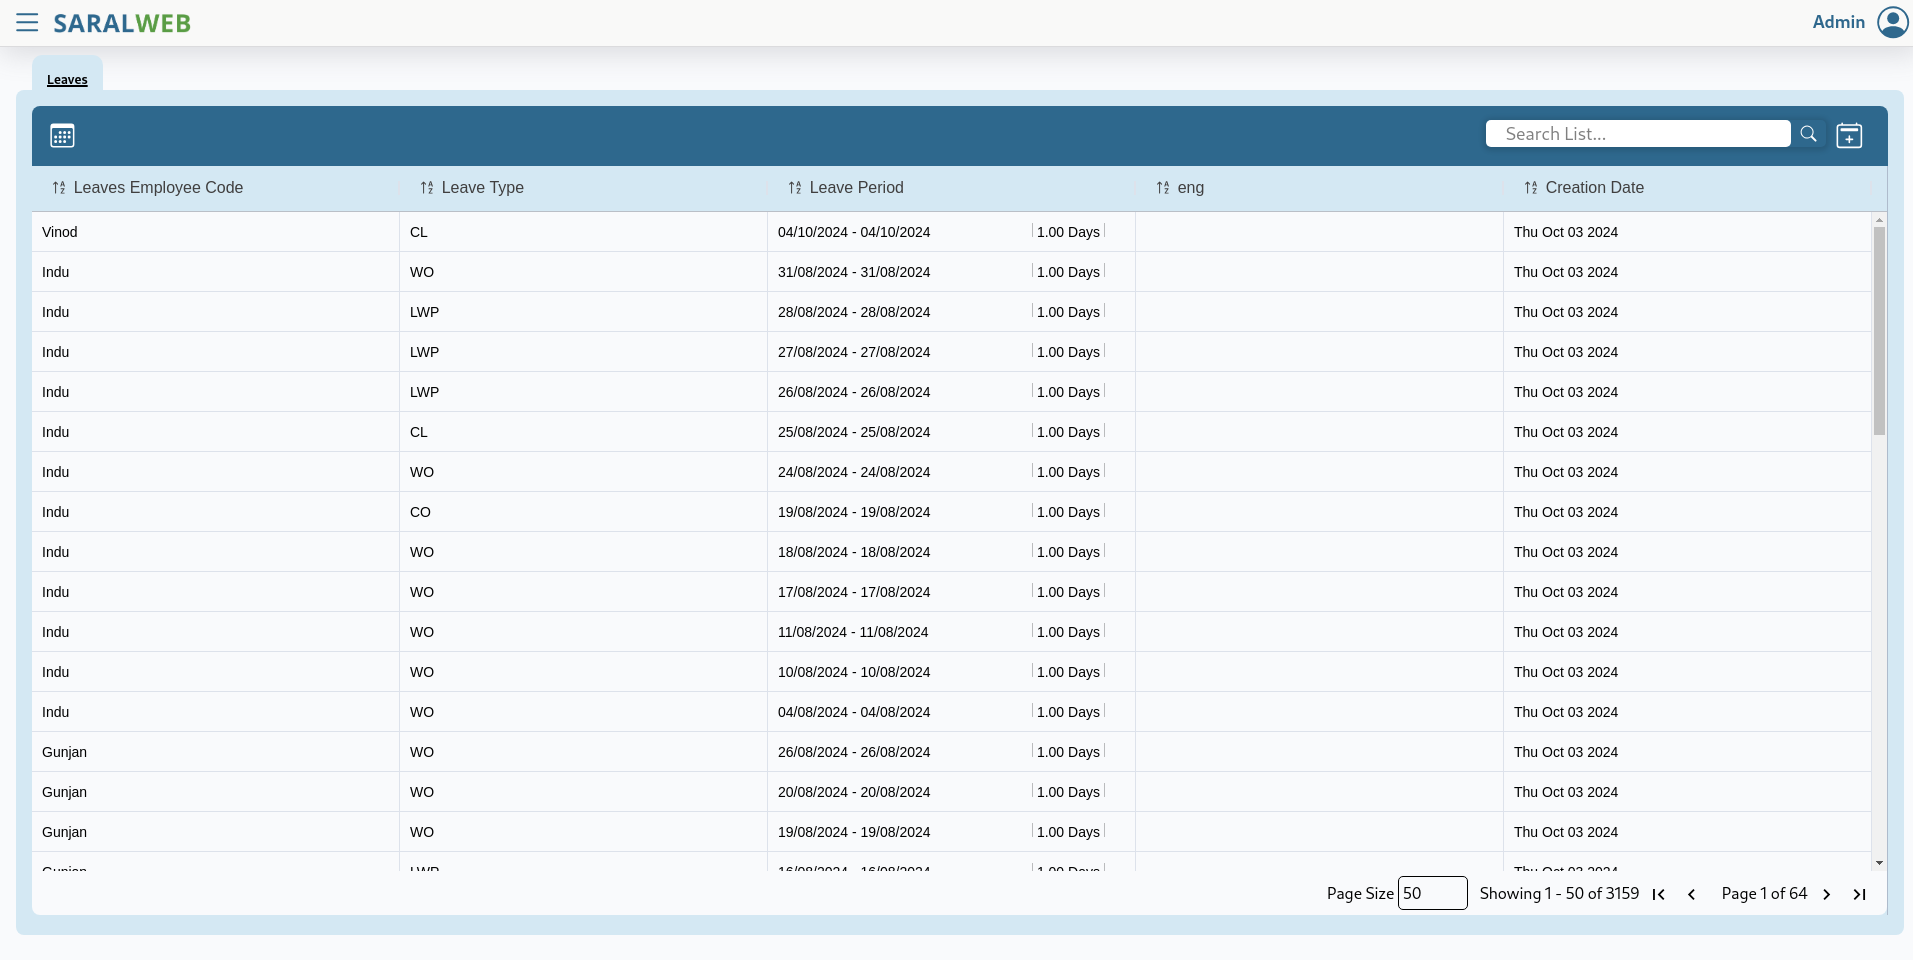
The folder serves two different purposes based upon the work the type of account. For admin account, the folder works as a dashboard displaying the leave status of all the employees whereas for employees it is used to apply the leave
Click on Actions and select Create Leave . A create tab will open on your screen.
Fill in the following details
Employee Code - Type in the Employee code for the employee you wish to create a leave for.
When you select an employee, their respective leave summary is displayed on the screen.
Leave Type - Select the leave type from the drop down menu. Please note that the leaves that were created in the Leave Type folder will be a part of the list.
Leave Period - Click on the calendar icon and select the date from which the employee will be on leave and the date till which the employee will be on leave.
If required, upload the necessary documents by clicking on the Upload files button.
Click on Create Leave button on the top right hand corner of the screen.
The leaves applied by employees are counted only after they have been approved by the reporting officer/ admin. To approve the leave, please follow the following steps
In leaves folder, use the calendar view icon to switch to calendar view
calendar
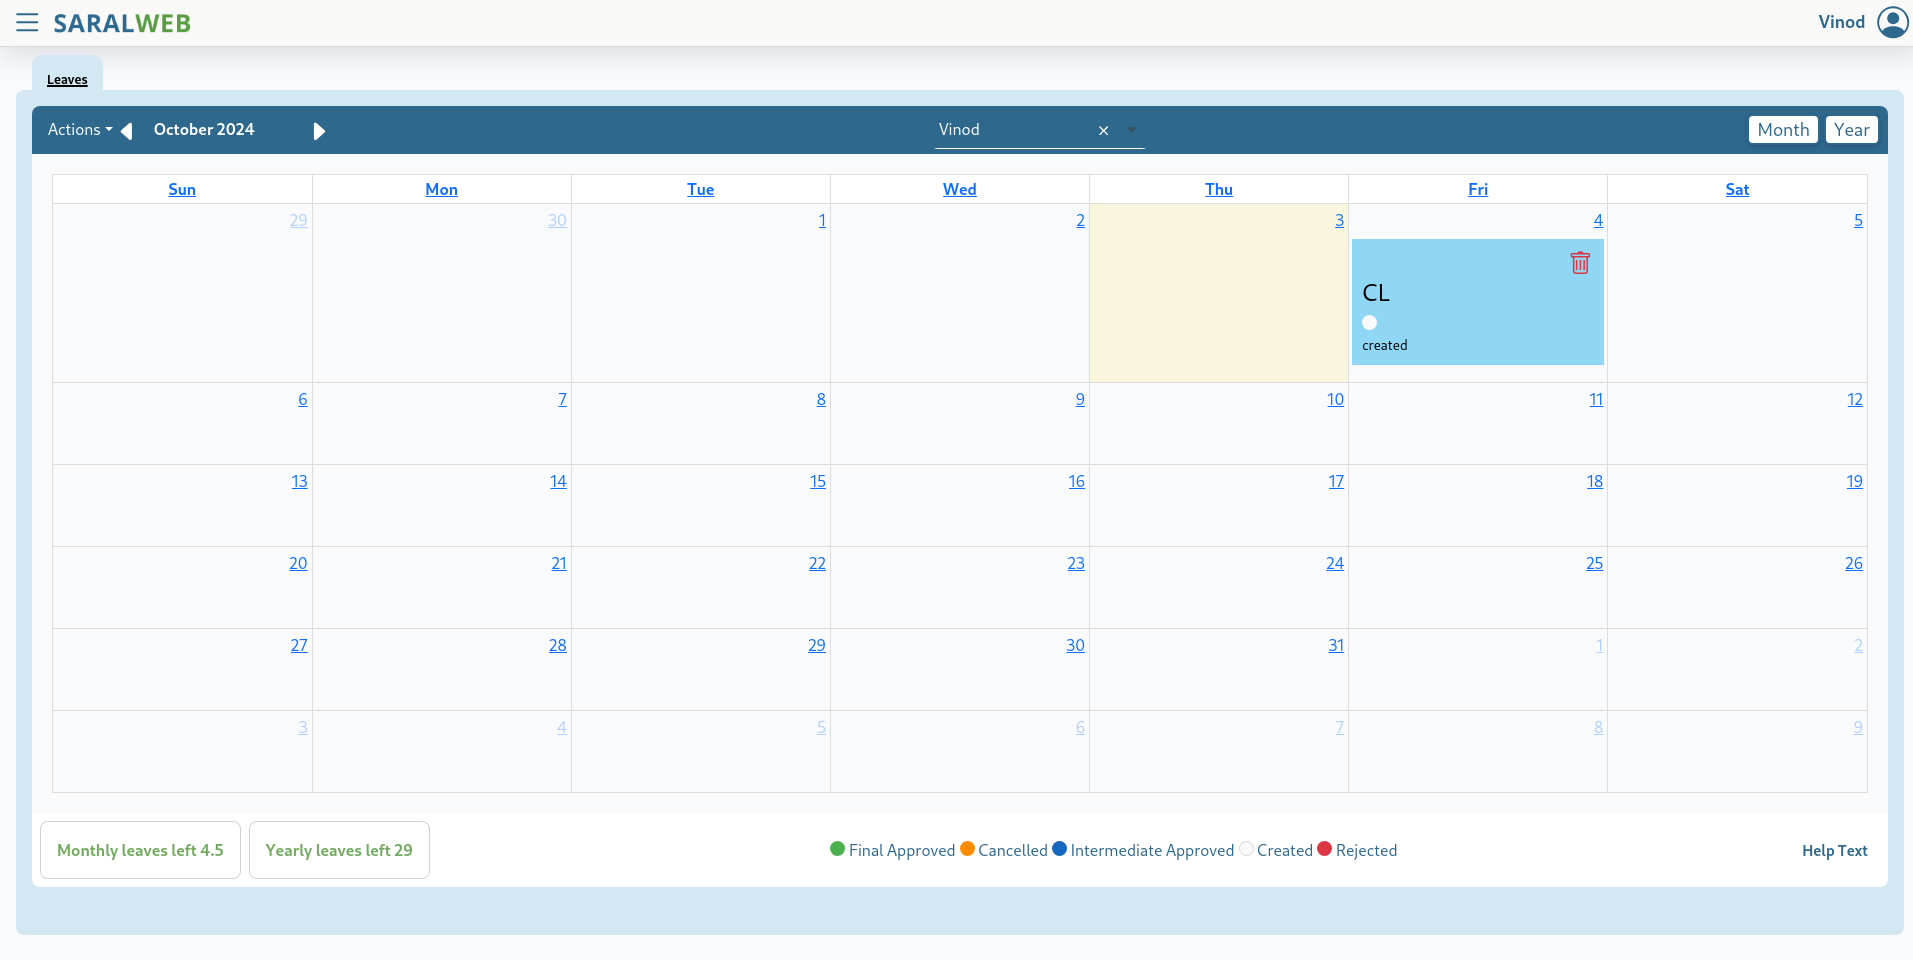
A employee leave tab will open on your screen. Select the employee, by typing the name of the employee in the " Please select employee" section. Please note that once you start typing the name of the employee the system lists down the possible matches. You can select the employee using the arrow keys and then pressing enter.
All the leaves applied by the selected employees will be listed on your screen.
Select the leave on which you wish to take an action, by pressing "CTRL" button on your keyboard and then selecting the leaves on dates on which you wish to take action on.
Once you have selected the applied leaves, click on action and select "Approve Leaves"
Please note the similar steps can be used to Reject, Cancel and Delete leaves for the selected employee with the only difference being the action selected under the "Actions" button.
Leave folder is visible in employee account and is used by employee to apply for leave. To access the leave folder in employees' account, please follow the following steps
Log in to your SARALWEB account and go to Leaves Folder
You will be directed to leave folder that shows the calendar of current month.
You will find the following options in the Leave Folder
Actions - Under the Actions button, you find the following
Create Leaves: Used to create a leave
Cancel Leaves: Used to cancel a leave that has been already been approved.
Delete Leaves: Used to Delete a leave that has been created.
Month - The current month. You may change the month by clicking on the Month's name, or using the arrows provided on either side
Employee Name- Name of the employee whose leaves are being applied or are shown on the screen
You can apply the leave using one of the following methods
Calendar Selection
Click on the date for which you wish to apply leave for
A create leave window will pop up on your screen.
Select the Leave Type. Please note, the leave types defined by admin will be available as a drop down
Leave Status for a new leave would be created. In case you have already created a leave, it will show the status of the applied leave
Upload the leave document (if any) by clicking on the select files option and then uploading the file from your system. A preview of the uploaded file will be available in the Leave Documents section
Click on Apply Leave
You may watch the video below, by clicking on it, to know more: