This manual is meant to assist the user with SARALWEB’s visitor management system in hospitals. The solution allows you to add patients, generate visitor’s QR code, share it on Whatsapp, and discharge patient.
Once your IN and OUT devices have been connected to your local WI-FI network, you can access the visitor management solution on your browser,through the following steps
Connect your laptop/desktop with the same WI-FI network, which has been used to connect the OUT device
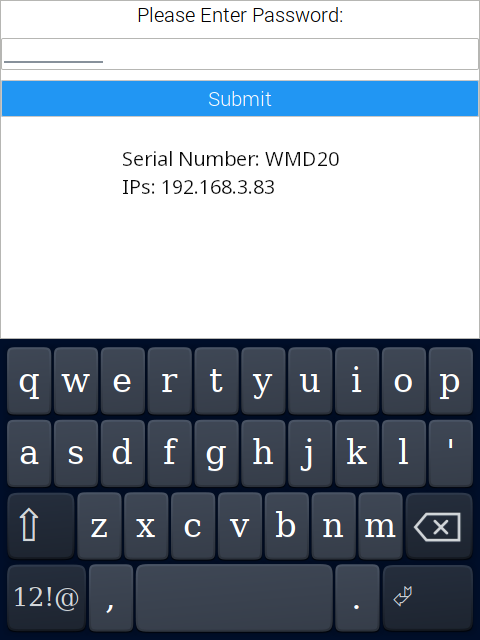
On your OUT device, tap on “Click for Home Page”
A keyboard will appear on your screen. The screen will also show the device’s serial number and the IP address
wmd5.png
Insert the IP address on your browser
You can now access the visitor management solution on your browser and perform the daily operations.
Sites are the location where we are implementing the visitor management solution. Eg: A Department in Hospital. To add a site, we will use the following steps
Click on the menu button present on top left corner of the screen
vms01.png
Select “SITES” by clicking on it
SITES DATA page will open on your screen
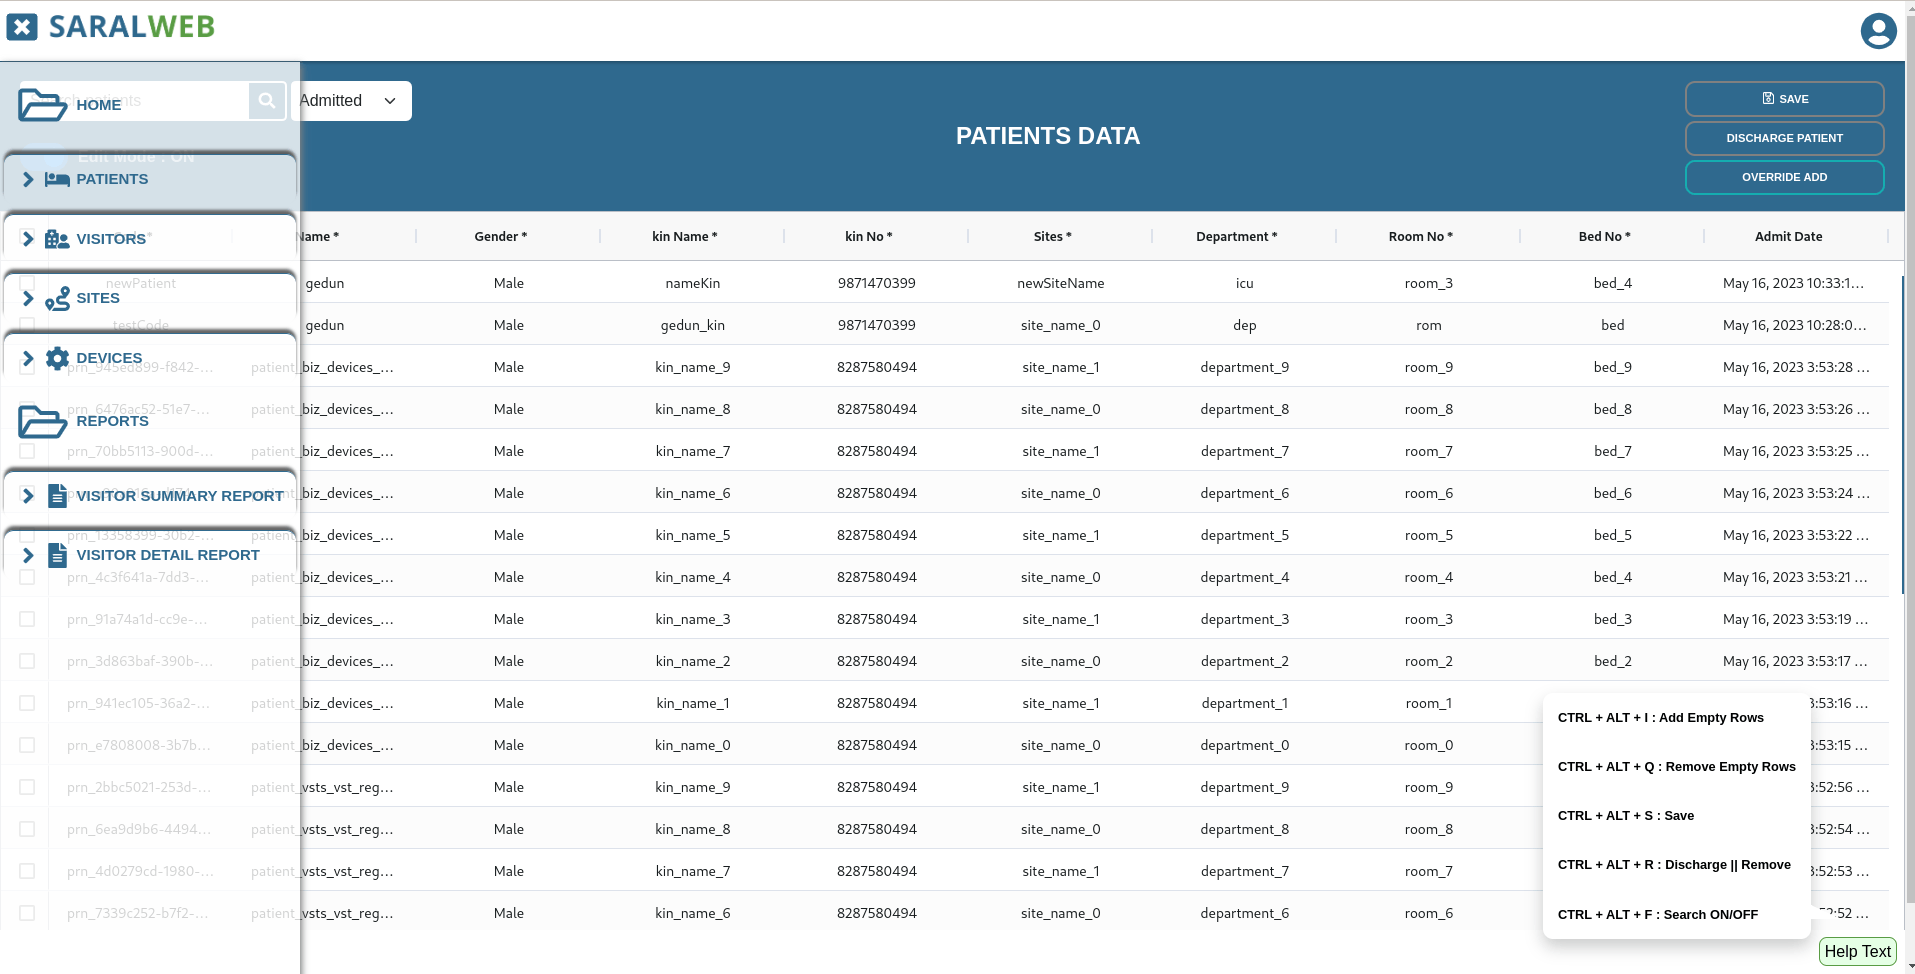
Turn on the Edit Mode, by clicking on the button
vms02.pngvms03.png
Once the edit mode has been turned on, we can add sites to our system.
Press Cntrl+ALT+I to insert a new row
Fill in the necessary details, and click on save. (You may use Cntrl+ ALT + S as a keyboard short cut)
Once we have added the site’s information, we need to allocate the device to the site. To do so, we will add device to the system using the following steps
Click on the menu button present on top left corner of the screen
vms01.png
Select “DEVICES” by clicking on it
Devices Page will open on your screen
Turn on the Edit Mode, by clicking on the button
vms02.pngvms03.png
Once the edit mode has been turned on, we can allocate devices to our sites
Press Cntrl+ALT+I to insert a new row
Fill in the necessary details, and click on save. (You may use Cntrl+ ALT + S as a keyboard shortcut)
Device Name : The name assigned to the device being allocated to the site
Code : The code assigned to the device being allocated to the site
Serial Number : The serial number of the device being allocated. You may check the device’s serial number by tapping on Click to Connect to WiFI
Sites : Select the site at which the device is being allocated using the drop down menu. Please note that the drop down menu will only show the names of the sites that were added through SITES page
Operation hours: This field is used when the device needs to be active only for a certain time period such as visiting hours. This field is not mandatory and if left blank. Device will be active for all hours of the day
Once we have defined the sites and have allocated the devices to the them, we can proceed for using the Visitor Management System. Patient’s information is added to the system and visitor’s are recorded against it. To add the patient, we use the following steps
Click on the menu button present on top left corner of the screen
vms01.png
Select “PATIENTS” by clicking on it
Patients Data Page will open on your screen
Turn on the Edit Mode, by clicking on the button
vms02.pngvms03.png
Once the edit mode has been turned on, we can add patient’s information to our system
Press Cntrl+ALT+I to insert a new row
Fill in the necessary details, and click on save. (You may use Cntrl+ ALT + S as a keyboard shortcut)
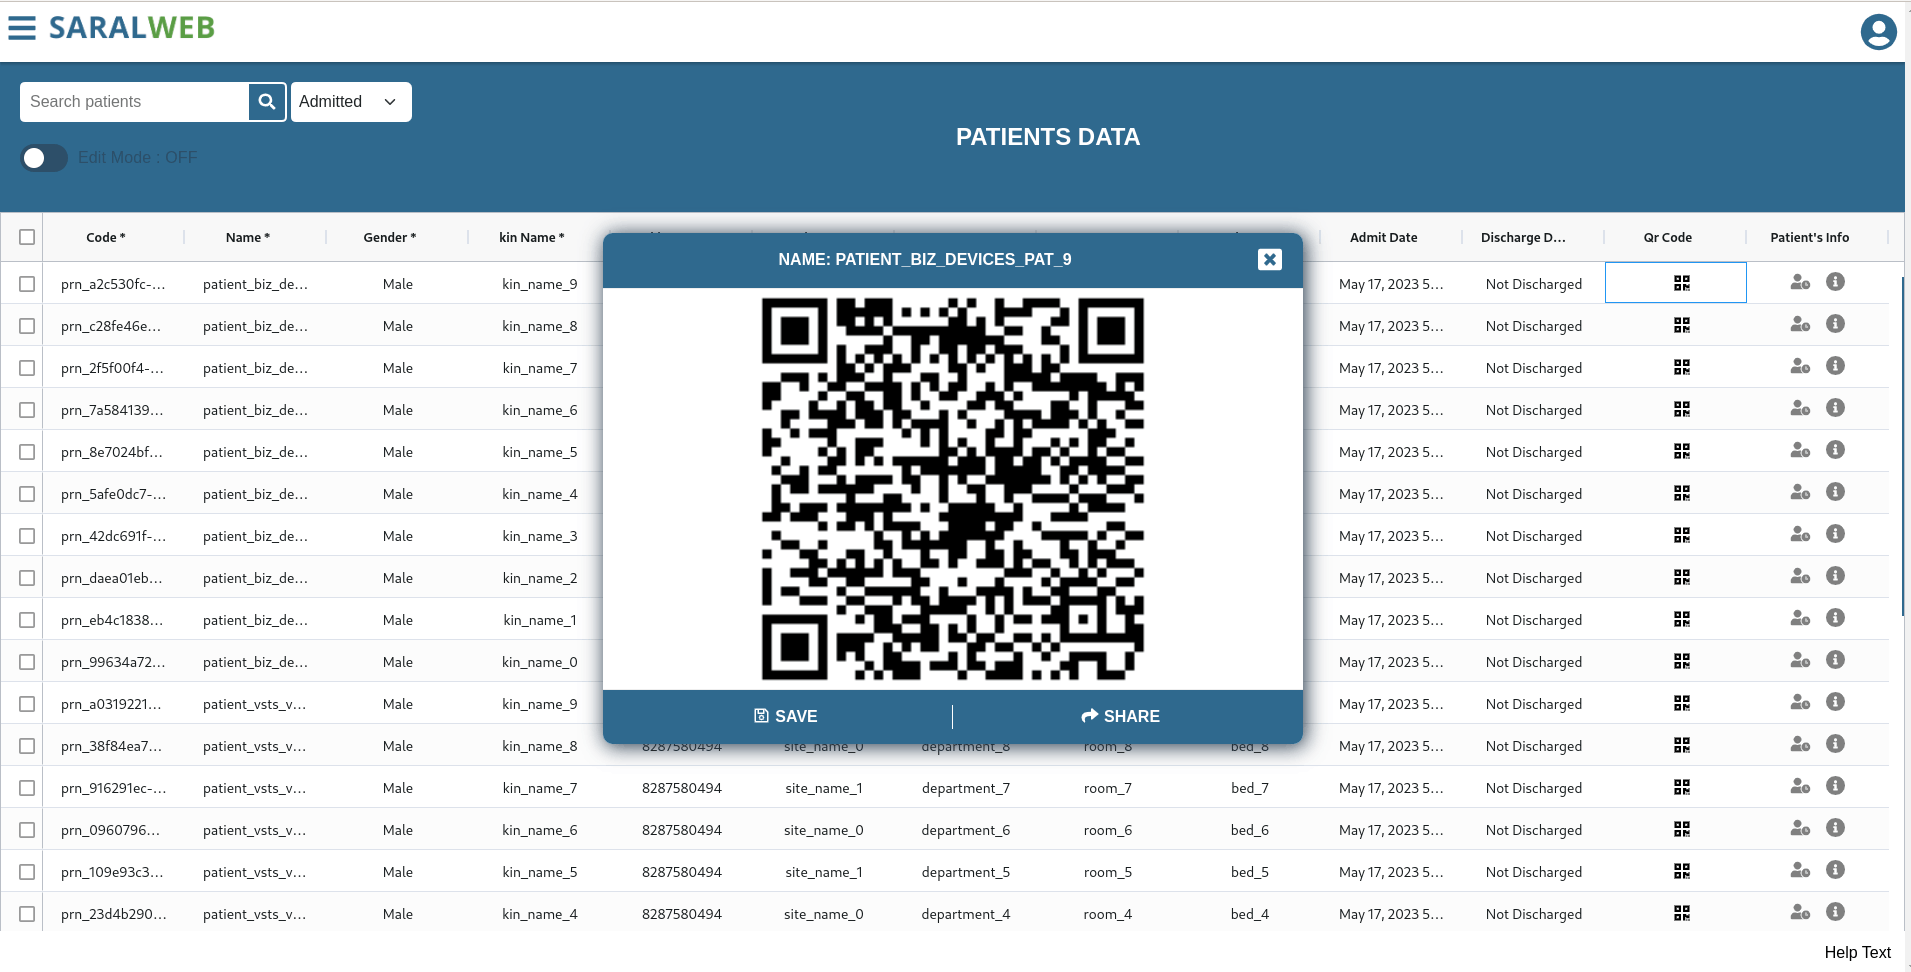
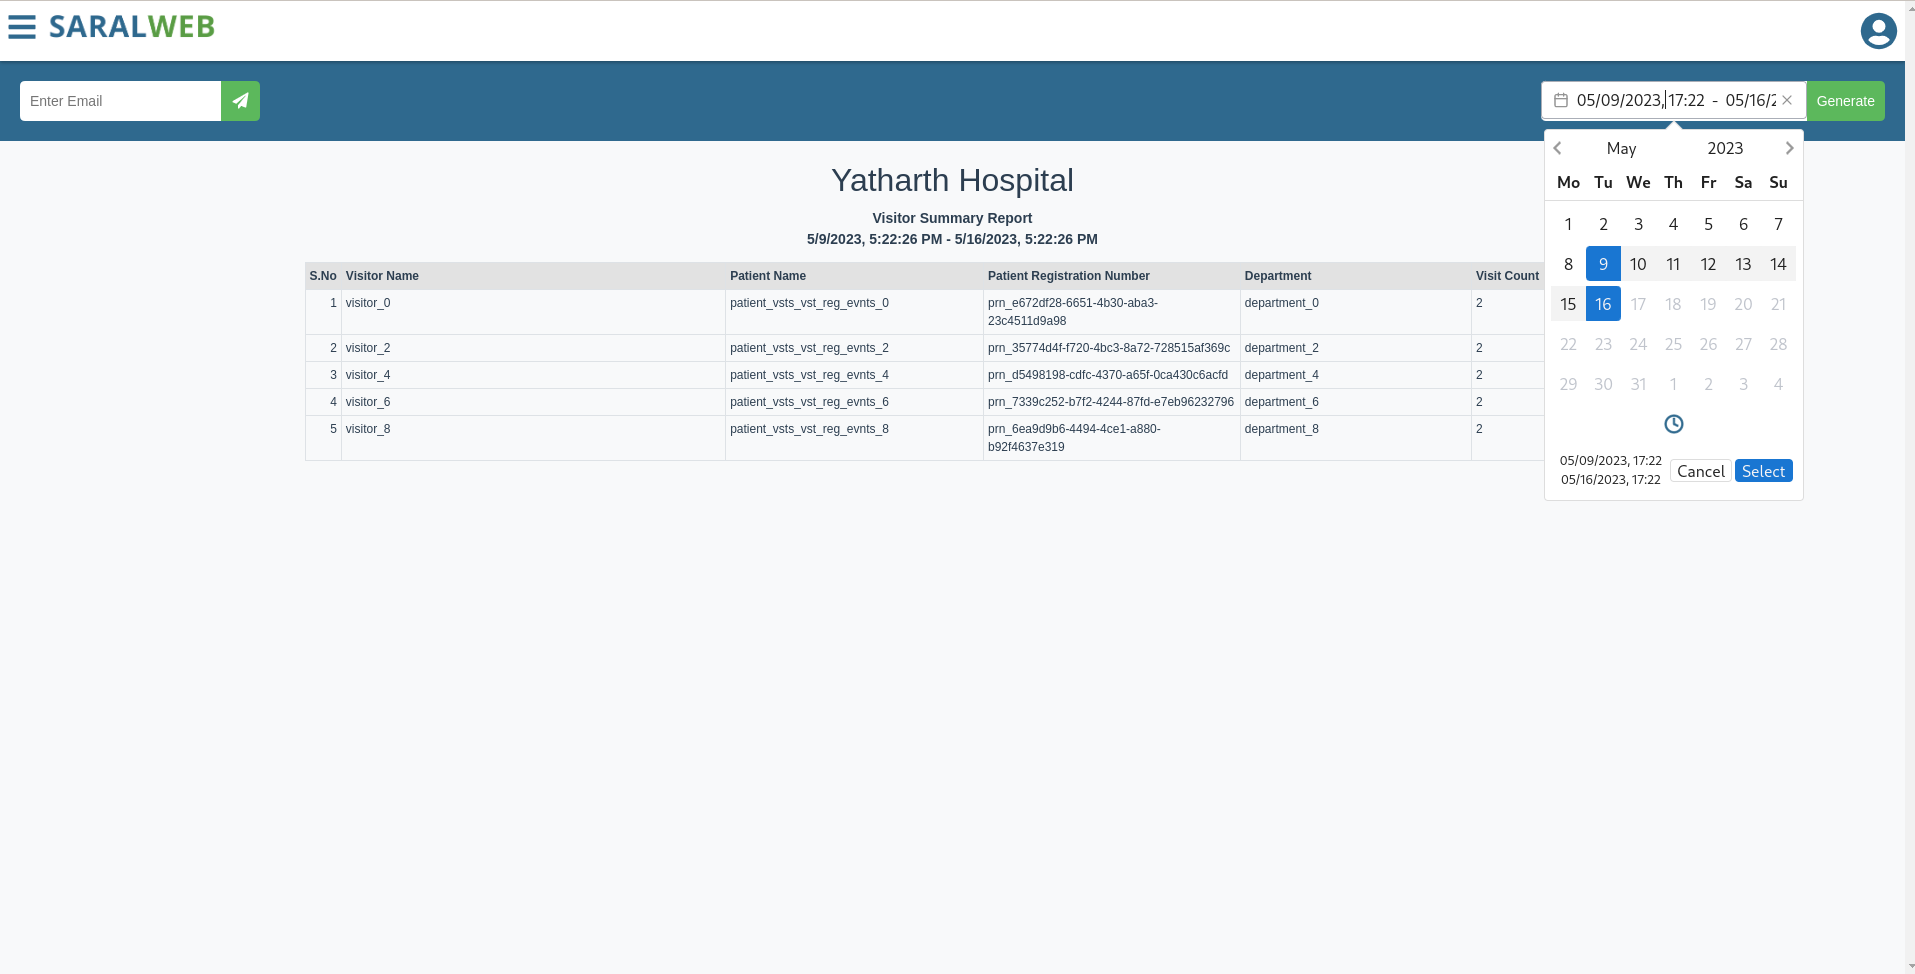
There are two reports that are automatically generated namely Visitor Summary Report and Visitor Detail Report . You may access the report by following